Posts mit dem Label crafty werden angezeigt. Alle Posts anzeigen

Donnerstag, 23. Mai 2013

Daisy hairpiece tutorial

Hello dolls 

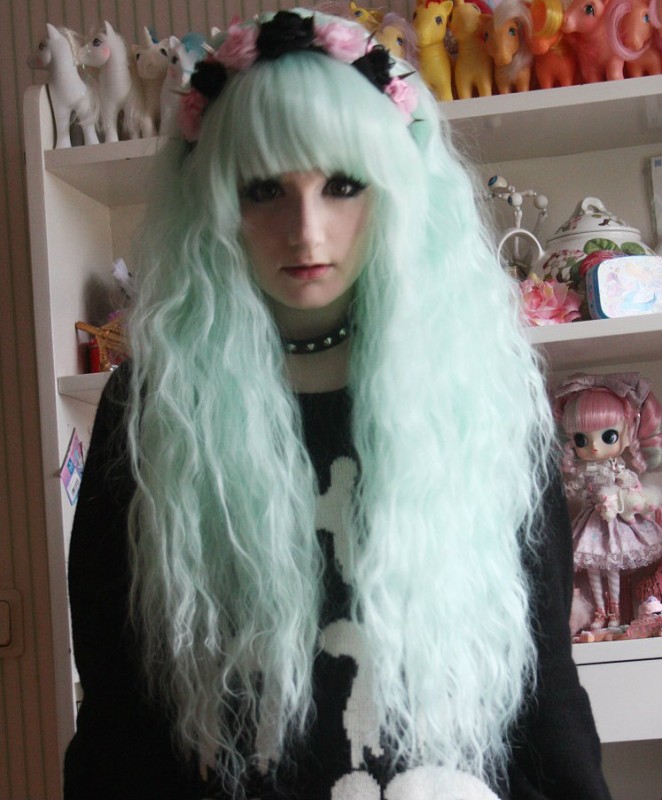
With this post it is official, I'm addicted to flowery headaccesoires!
This time I will show you how to make this:


It's super easy and only takes a few minutes.

You will need:


Flowers of your choice
Pearls of your choice
Satin ribbon of your choice

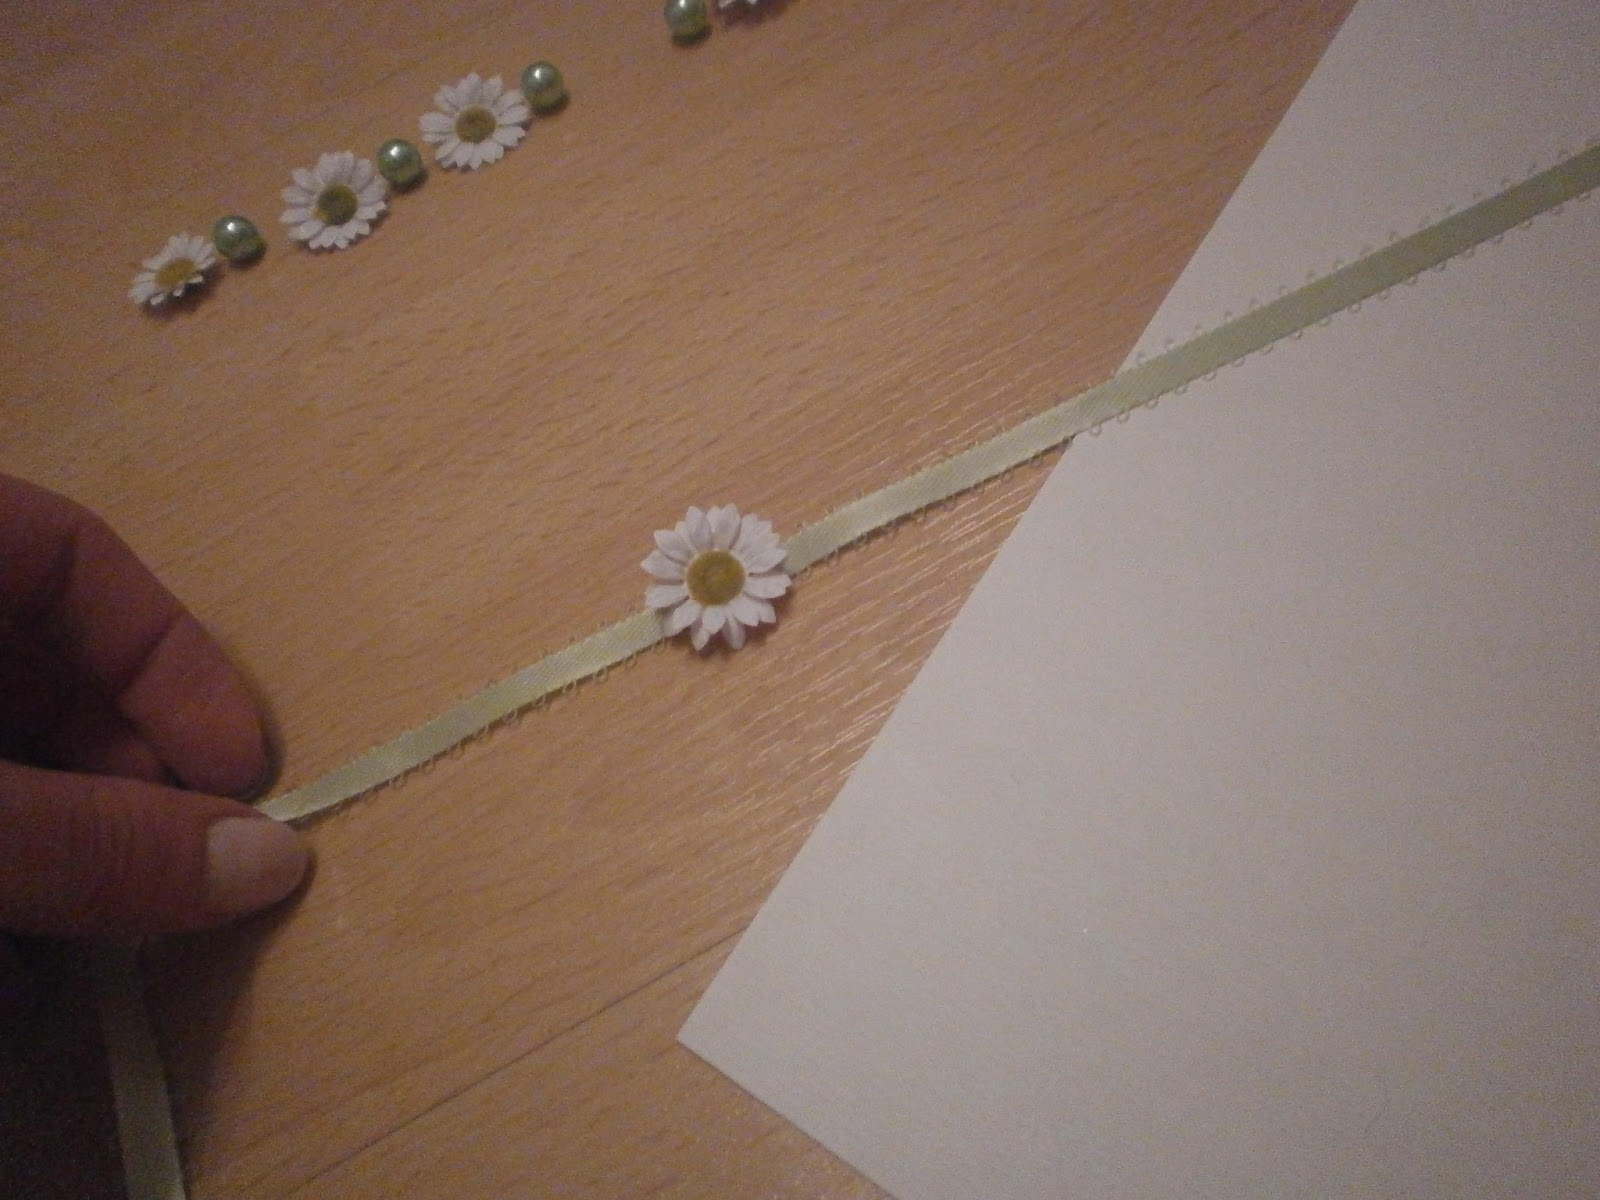
Step #1 (optional): Arrange the flowers and the pearls on the ribbon to check how it will look. I did this because I tried out different colours of pearls. For me it looked best with the green ones.


Step #2: Using a hat glue gun attach one piece after the other


Take your time and be careful with the hot glue gun :)


And you are done :)
I especially love how this looks with a bun:


I hope you enjoyed this easy and quick tutorial :)
If you decide to make your own send me a picture!
Yaya 


Freitag, 17. Mai 2013

♡ Crafternoon with Punkangel ♡

Hello dolls 

Today Punkangel and me held a Crafternoon again. (I blogged about the last one here) This time we met at her house. She served some delicious cupcakes! I think I ate way too many xD

We decided to wear Casual Lolita. I stayed at the very casual site with only a very small petticoat because I had to go to school before.


Me chillin' in the grass ~


I crafted a rose headband again. I showed you how to make them in this post. 

I also made a birthday card but I didn't take photos of it. 
(I hope to make a tutorial on how to create selfmade cards soon) 

We had a fun day and I hope we can have a Crafternoon soon again 
See you next time,
 Yaya 


Freitag, 4. Januar 2013

Rose Headband Tutorial

Hello lovelies 

I finally have a new tutorial to present you.
I'm in love with these rose headbands that are so popular right now.


In local stores I couldn't find a headband matching my taste so I decided to make my own. It's pretty easy I have to say ;)


This is how they looked finished. I made one that is more toned down for everyday life and a huge one for OTT outfits.

What I used:


In the store they only had complete flowers. I absolutely wanted to make the headbands today so I bought them and just removed the heads from the stalk.
For the toned down one I used:
Small white roses
Mini red flowers

For the OTT headband I used:
epic pink roses
medium sized white roses

I bought the headband at a drugstore.

Step #1
Remove the heads of the roses


Step #2 
Remove these small stick parts from the downside of the flowers. I cut them of with a scissor.


Step #3 
Decide how the flowers should be arranged .


Step #4
Using a hot glue-gun simply glue the flowers one after each other onto the headband.
Be careful when working with the glue- gun! 


And that is all ~
You should have a finished headband now!


Modeled by my alpaca Candy 

For the OTT band you do pretty the same. Just keep in mind that the big roses are heavy and will need more glue. 


Modeled by Cotton because I don´t feel like taking photos of myself today^^

That's it. I hope the tutorial is useful for you. If somebody of you decides to make one I would love to see it!

Love,
Yaya 

Donnerstag, 27. Dezember 2012

Crafternoon with Punkangel

Hello cuties 

I know I promised you a post about the lovely presents I got for Christmas this year but before that I have something else to share with you. Today me and Punkangel met up at my flat to do some crafty things. We sewed and made `decoden` stuff while chatting and listening to music. And as a plus we both wore our Mori Kei outfits.

My outfit:


Details 


With shoes


Derpy faces hidden xD

We actually had a Crafternoon before but I didn´t blog about it back than as I didn´t really make anything useful xD

What I crafted:


I made this candy bracelet. Here is a short tutorial for you:

Step #1 Sew the candy shape using this tutorial: 


Step #2 Make a chain using whatever thread and pearls you like.


Step #3 Add accessory if you want. You can glue or sew stuff on the candy ~
Then you are finished!


I also decorated a mirror: 


You can easily make this by using glue :3

I hope we can have such a lovely day soon again!
Make sure you also check out Punkangel´s blog for more pics =)

See you soon,
Yaya  


Sonntag, 4. November 2012

Jewellery case painting tutorial ~

Hello cuties 

 I´m very excited to present you my very first tutorial 

Since ages I had this jewellery case and I never really liked the colour.


On a Gyaru blog I saw a tutorial on how to paint a bag with acrylic colours and I thought why shouldn´t that work for my jewellery case too?

If you want to follow the tutorial you will need:
Case you want to decorate
Acrylic colour
Rhinestones
Tweezers

First I mixed some white and red colour to create a light pink.

Apply the colour to the case.


It is likely that you will need several coats of colour so that it turns out opaque.
I had to apply 4 coats. Always let the last coat dry before you add the next ~


After two coats I had this..


...and after 4 it looked like this :)
I added some white colour to the lock. 

The inside of the case is made out of a soft material so it isn´t possible to add acrylic colour to it..


So I only painted the drawers and the big space under the mirror.

After adding all the colour I decorated the mirror with some rhinestones


If you do that make sure the glue you use drys transparent. 
You put a little bit of the glue onto the mirror and set the stones into the glue. Just check that the tweezers do not get full of glue. 


The same way I also added some rhinestones to the drawers...


...and to the lock


And that´s all. I hope you liked the tutorial and found it helpfull :3
If anybody of you decides to desing their own jewellery case I would like to see it!

See you soon,
Yaya